Getting Started with Snapshot Tests in Playwright
As your web app matures, it becomes challenging to ensure your GUI doesn't break with any given update. There are a lot of browsers and devices, and countless states for every one of your components. Unit tests ensure your code remains consistent, and E2E tests will ensure your system remains consistent, but neither will catch visual anomalies, layout issues, or platform compatibility issues.
Enter visual testing. Visual tests store snapshots of your app's appearance, and compares them to the current state of your app. No more surprise bugs. No more developing in three different browsers and 12 different breakpoints. Visual testing automates the process, ensuring your app looks exactly right, all the time.
This article covers the basics of visual testing with Playwright. If you're interested in going deeper into visual testing, you'll love my Ultimate Guide to Visual Testing in Playwright.
Let's get started...
1. Install dependencies
If you already have Playwright installed, skip this step.
Otherwise, install your dependencies and create a sample test file:
# Install node dependencies
npm install -D @playwright/test
npm install -D typescript

# Install playwright browsers
npx playwright install

# Create the test file
mkdir -p tests
touch tests/homepage.spec.ts
2. Write your first visual test
Open tests/homepage.spec.ts and add the following code:
import {test, expect} from '@playwright/test';

test('home page visual test', async ({page}) => {
  await page.goto('https://www.browsercat.com');
  await expect(page).toHaveScreenshot();
});
3. Run your visual tests
Run your tests with the following command:
npx playwright test
The first time your run your tests, they will fail with an error message like this:
Error: A snapshot doesn't exist at {TEST_OUTPUT_PATH}, writing actual.
This is expected. Since Playwright has nothing to compare expect(page).toHaveSnapshot() to, it must fail the test. But don't worry: the next time you run your tests, Playwright will compare the current state of the page to the stored snapshot.
So run your tests a second time:
npx playwright test
Success! You should see a message like this:
Running 1 test using 1 worker
  1 passed (6.6s)
If your test failed, take a few minutes to see if you can fix the issue. If not, continue reading. I cover numerous troubleshooting tips later in this article.
Where are snapshots stored?
By default, test snapshots are stored alongside the test file that created them.
When a visual test fails, Playwright will store the "before" image, the "after" image, and a "diff" image in the ./test-results directory. These will come in handy later, for debugging your failed tests.
(Keep reading for advice on configuring the location of these snapshots. You probably don't want test output littering your codebase.)
4. Updating test snapshots
Awesome! Your test now confirms there haven't been any changes to the page, but what if you actually want to make some changes?
To update your snapshots, run your tests with the --update-snapshots (or -u) flag:
npx playwright test -u
This command will run your tests and update the snapshots to match the current state of the page. If you run this now, you should expect a passing result.
A word of caution: This command updates all snapshots. Be very careful, as it's easy to accidentally update snapshots you didn't intend to.
How do I update only some snapshots?
To update the snapshots for a subset of tests, we can filter tests from the CLI. Only matching tests will be updated.
# Update tests with matching file name
npx playwright test -u "**/home*.spec.ts"

# Update tests with matching test name
npx playwright test -u --grep "home" --grep-invert "zzz"

# Updates tests within project
npx playwright test -u --project "chromium"
We'll go deeper into snapshot management later, but for now, let's focus on debugging...
5. Debug visual tests
We know how to update failing tests' snapshots, but what about when a test is failing because of a bug?
To explore this scenario, let's update our test so that our snapshot fails:
test('home page visual test', async ({page}) => {
  await page.goto('https://www.browsercat.com');
  await expect(page).toHaveScreenshot({
    // crop the screenshot to a specific area
    clip: {x: 0, y: 0, width: 500, height: 500},
  });
});
Now let's run the tests, asking playwright to produce an HTML report:
npx playwright test --reporter html
After that command, your browser should have opened to your test report. And it should show a failed result.
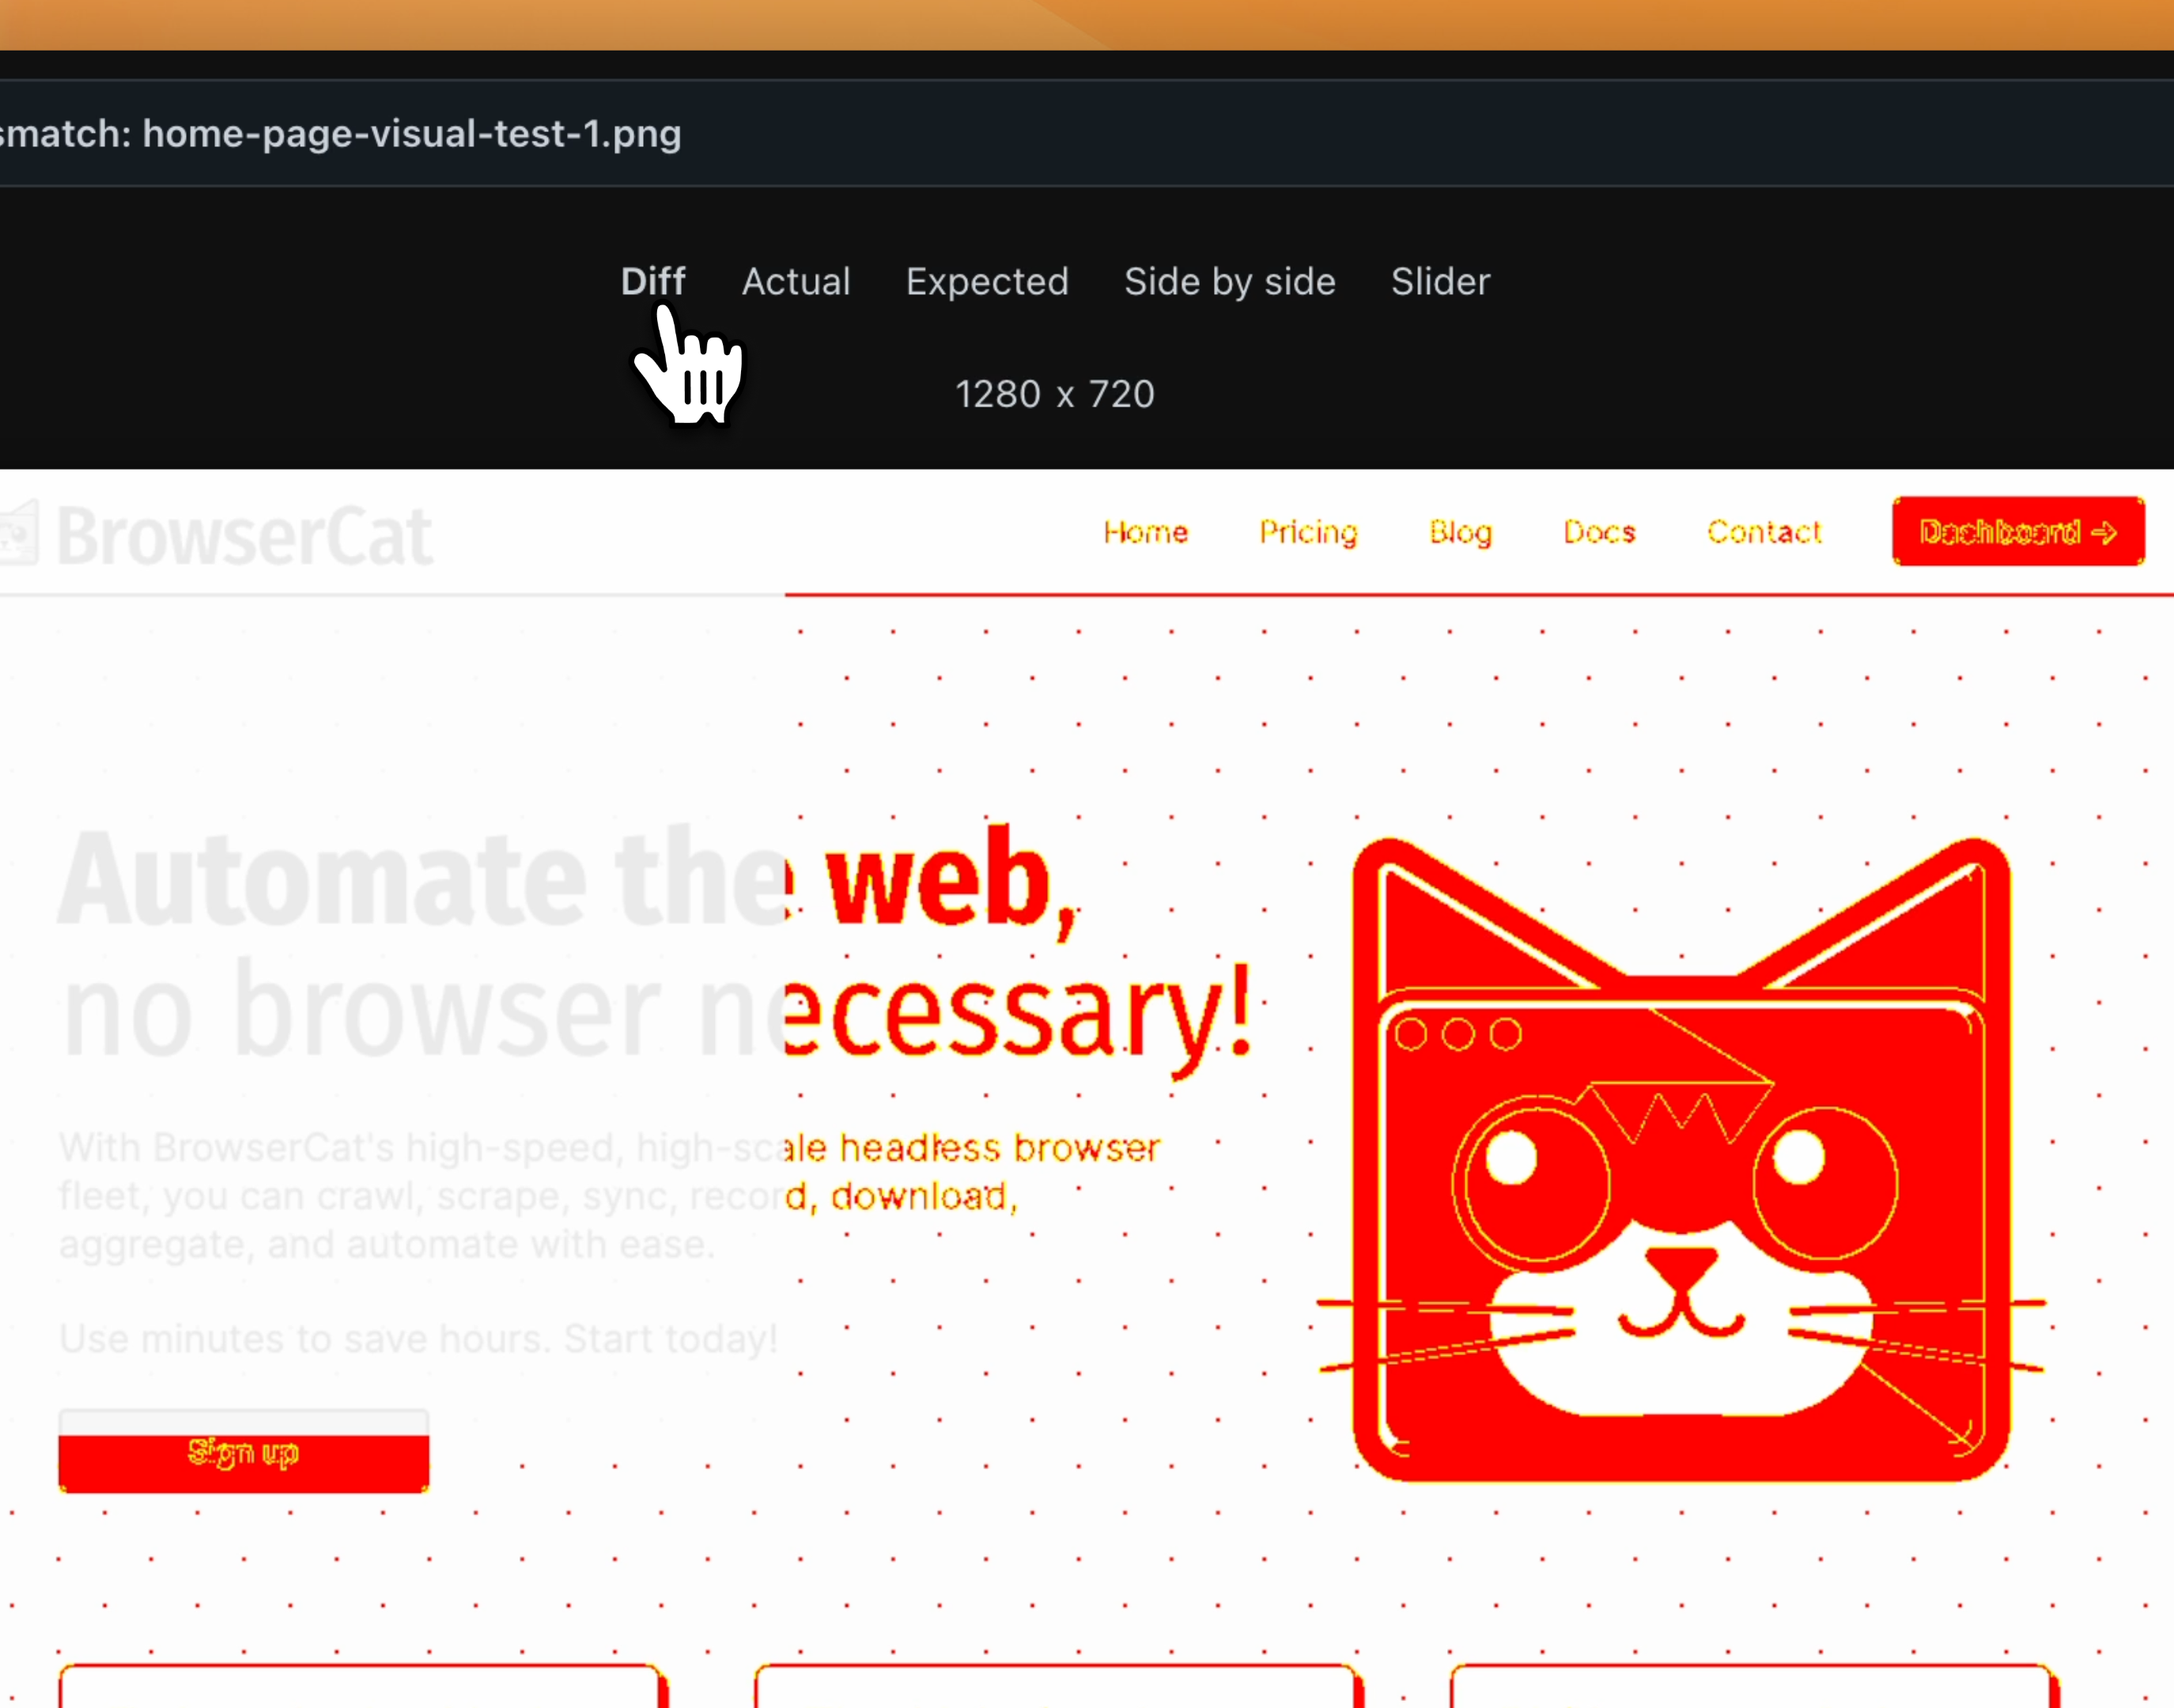
Scroll down to the bottom of the page, and you'll see this widget:

The "Diff" view offers a stark comparison between the expected and actual screenshots. However, I find the "Slider" view to be the most useful for actually fixing issues.
How do I interpret the "diff" view?
The "diff" view shows the difference between the expected and actual screenshots.
Yellow pixels vary between snapshots, but they fall within the allowed threshold for differences.
Red pixels fall outside the allowed threshold for differences. By default, even a single red pixel will fail your test.
For advice on configuring these thresholds, visit my Ultimate Guide to Visual Testing with Playwright, and learn how to make visual tests more forgiving.
Do I need to use the HTML report?
No, you don't have to use the HTML report to run visual tests (though I recommend it). Whether you generate an HTML report, failing visual tests will automatically output the "before," "after," and "diff" images to the ./test-results directory.
Often, I'll open the "before" image directly in VSCode while I work. That way I can keep my browser focused on my development app.
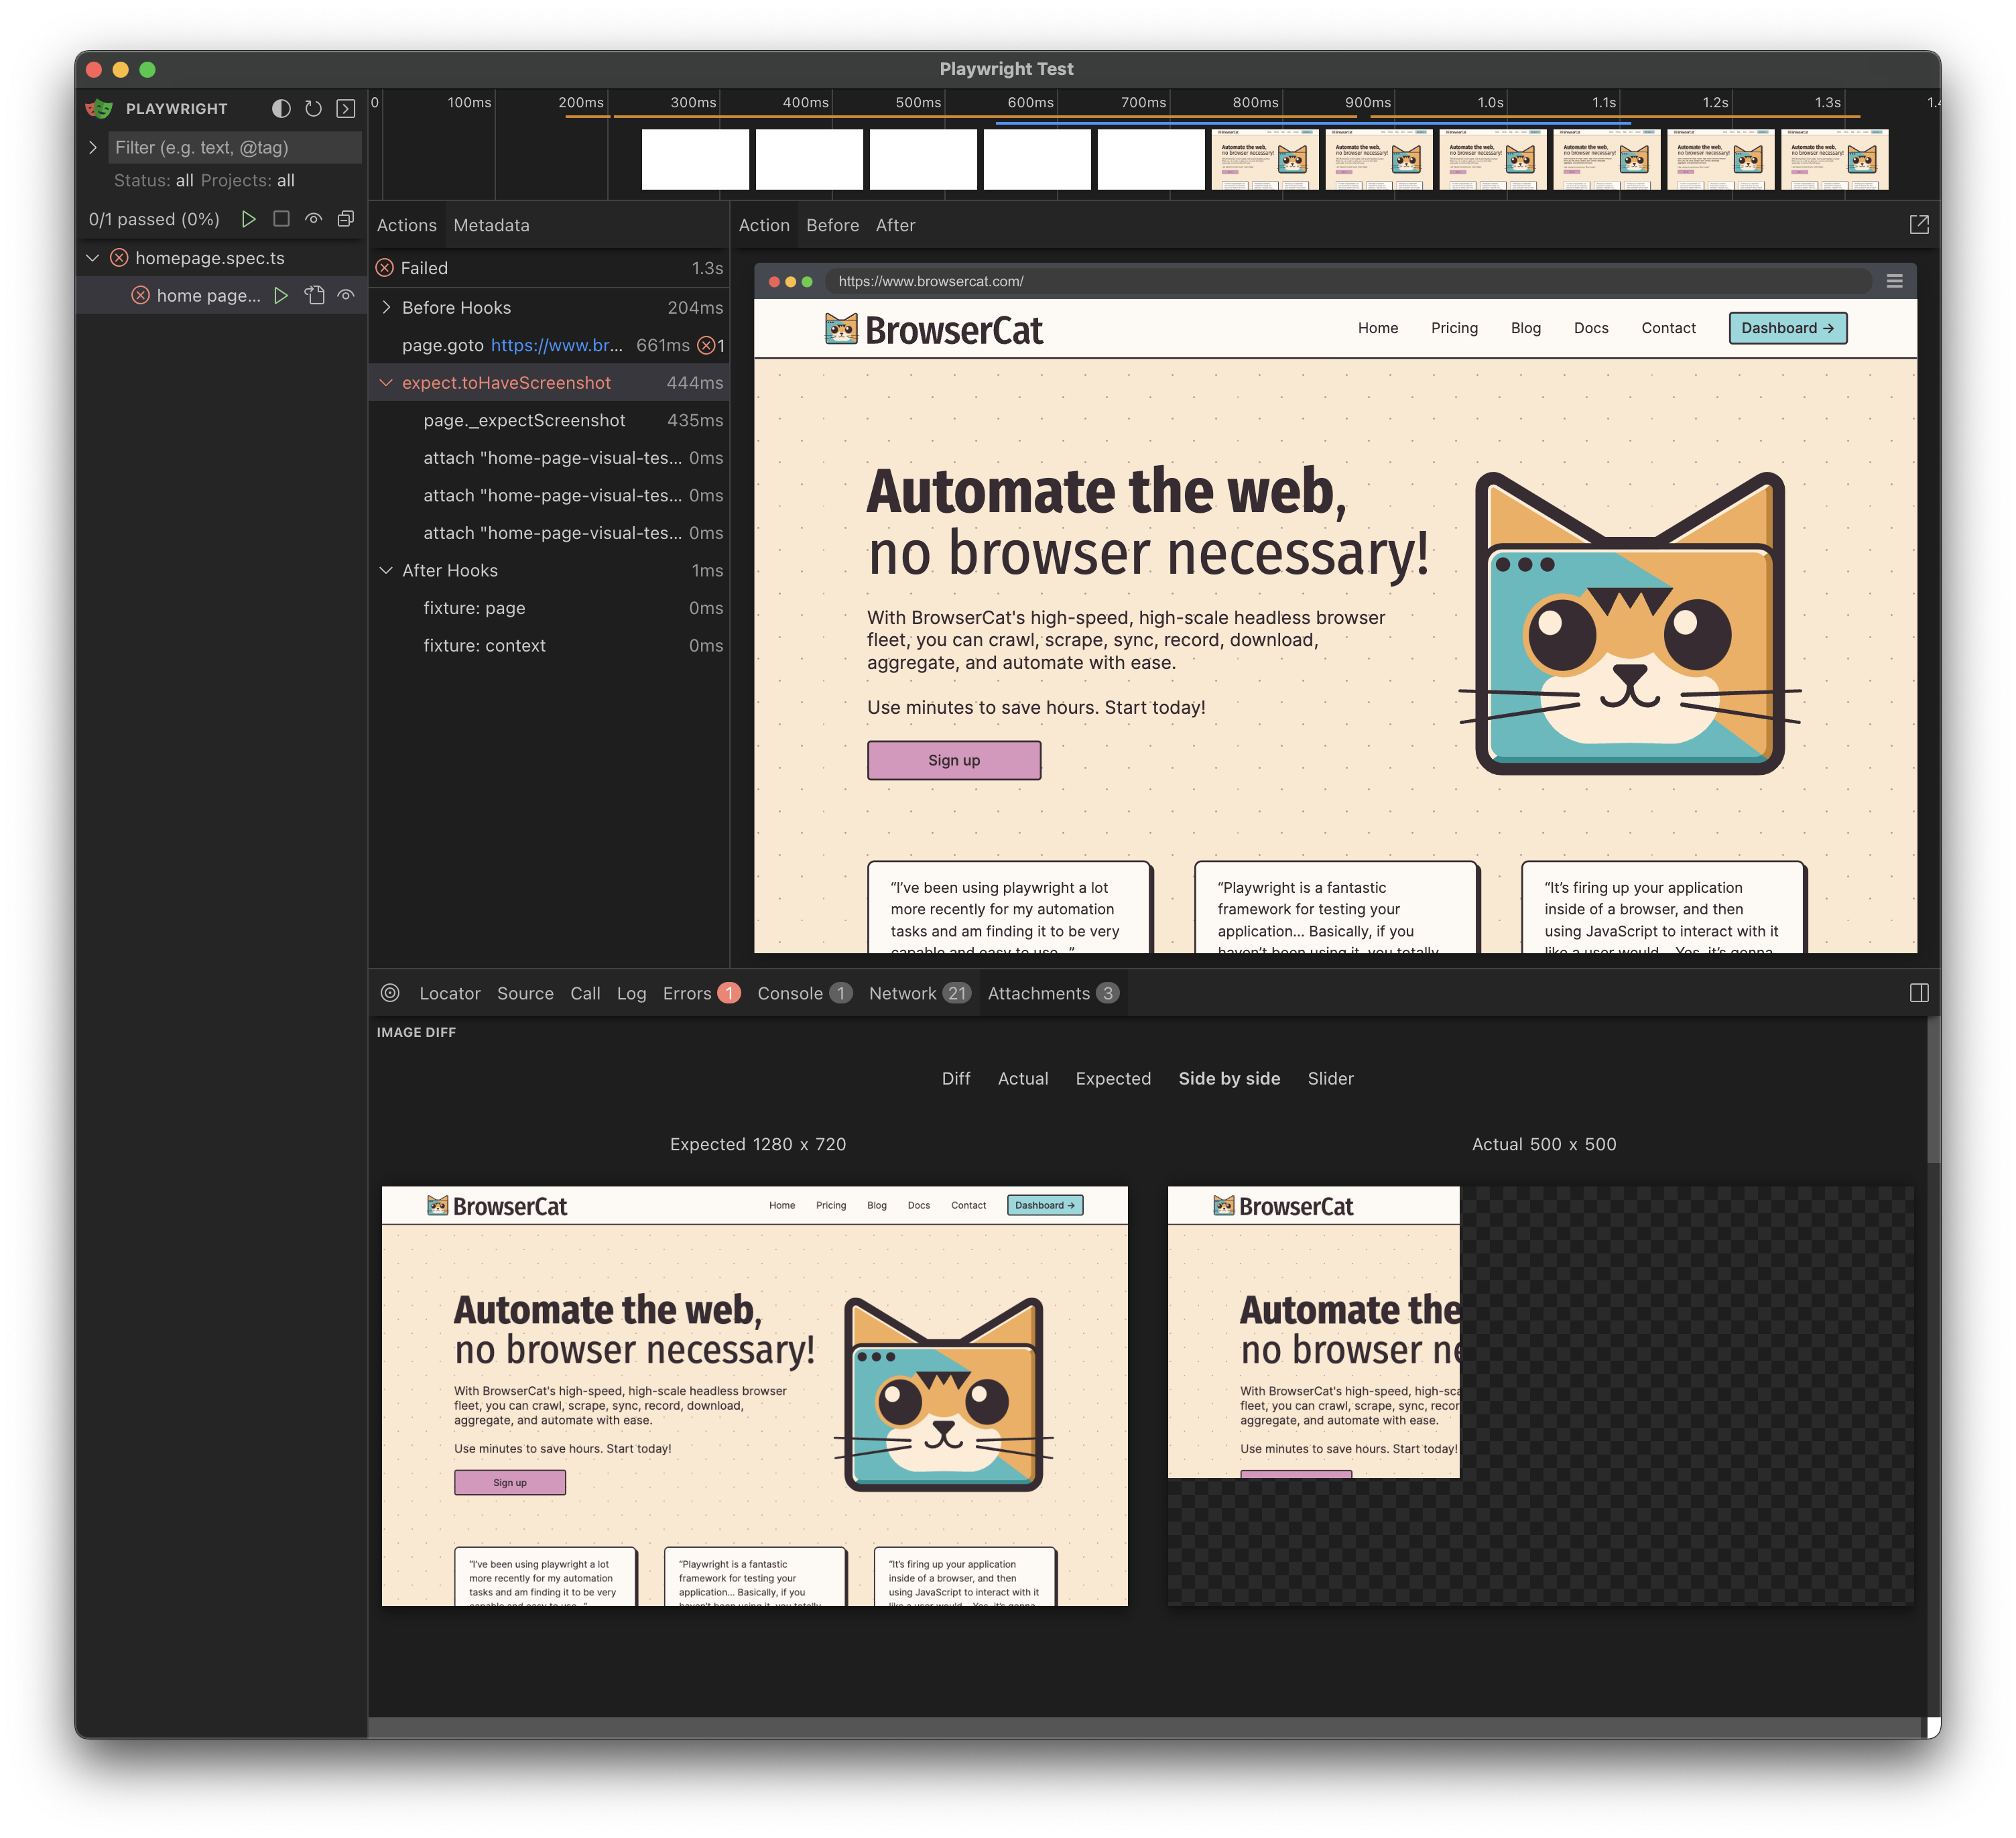
6. Use UI mode for quick visual testing
Playwright has an industry-leading "UI Mode" that makes working with tests a breeze.
While it has numerous killer features, my favorite is that it automatically snapshots the test after every single step. This allows you to quickly debug your tests. It also makes it very easy to spot the right places to insert a visual assertion.
To run your tests in UI mode, use the following command:
npx playwright test --ui
I encourage you to explore UI mode, as it has a wealth of useful features.

Next Steps...
You've now got a solid foundation for visual testing with Playwright. But there's so much more to learn!
For advanced tips, configuration guidance, and strategies for managing visual tests in your CI/CD pipeline, check out my Ultimate Guide to Visual Testing in Playwright.
In the meantime, happy testing!